
HOME & GARDEN
How to use a Handheld Sewing Machine?
Jun
Have a handheld sewing machine? Learn here to use them perfectly!. It is essential to learn how to use the handheld sewing machine because you know it is pretty common for people today to just throw away a perfectly stitched garment because of its small but flexible tear. It happens because the majority of the people do not own sewing machines today, and even if they have, they do not know how they work. Additionally, sewing machines are pretty expensive, and it is not worth it for people who do not even know the basics about saving or do not have a lot of sewing work coming in. However, the excuse doesn’t work out anymore because a handheld sewing machine is available, which is relatively cheap and small and doesn’t take much time to learn how to use it.
Basics about the handheld sewing machines
While you are looking for a machine, you must ensure that it fulfills the primary function of just seeing your fabrics and materials together using a simple thread. You must know that the handling machine works simply the same instead of having a table design that you generally see in the tailor shops, the handheld sewing machine is meant to be portable, which means you can use it anywhere you want.
You just need to hold the sewing machine in your hand, and you can stitch the tear. Manufacturers have prioritized the portability of the mini handheld sewing machines, and the majority of them are battery-powered. You cannot use the devices for crafting, but they are generally used for repair jobs.
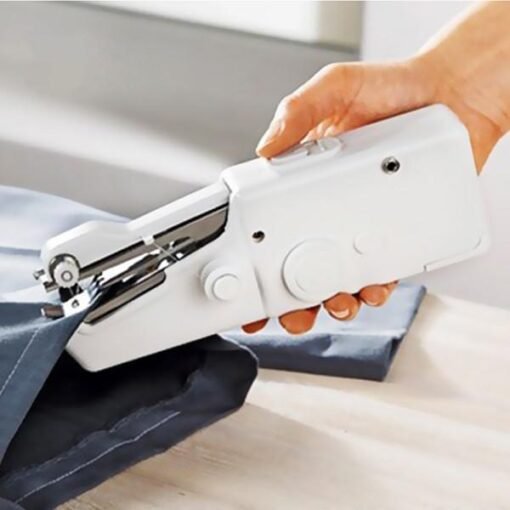
How to use the portable sewing machine?
It would be best if you learned how to set it up before you even think about starting your work on it because the machine wouldn’t take on the torn fabric and give you straight out of the box. Once you position the bobbin, it’s time to thread it through the machine. You can start with the closest thread guide and put the thread through it. The thread must go through the underside, and then it would exit on the top. Next, you need to lift the need alarm by turning the rotate reveal to start using it and then raise the pressure foot and put the fabric under the needle. Finally, you can use your left hand to pull the fabric to ensure that you are not stitching in the same place again; this way, the machine starts stitching.
It would be best if you secured the stitches once you are done, and you should stop the machine while raising the need alarm and pulling the thread out at least three machines from over the fastening plate. After that, you can pull out the fabric, lift the fastening plate, and ensure that you did not pull the thread while doing it to prevent the same from unraveling. Finally, you need to turn the fabric onto its back and use 3 inches of thread once you are done with the last stitch. For more details visit Ninja New‘s official website.