When you’re short on time but craving a sprinkle of creativity, 5-minute DIY crafts can save the day. These quick and easy projects are designed to unleash your inner artist without the fuss, offering fun solutions for when you need to spark your imagination in a pinch. Dive in and get crafting with minimal supplies and maximum enjoyment!
Creative Photo Frames from Cardboard
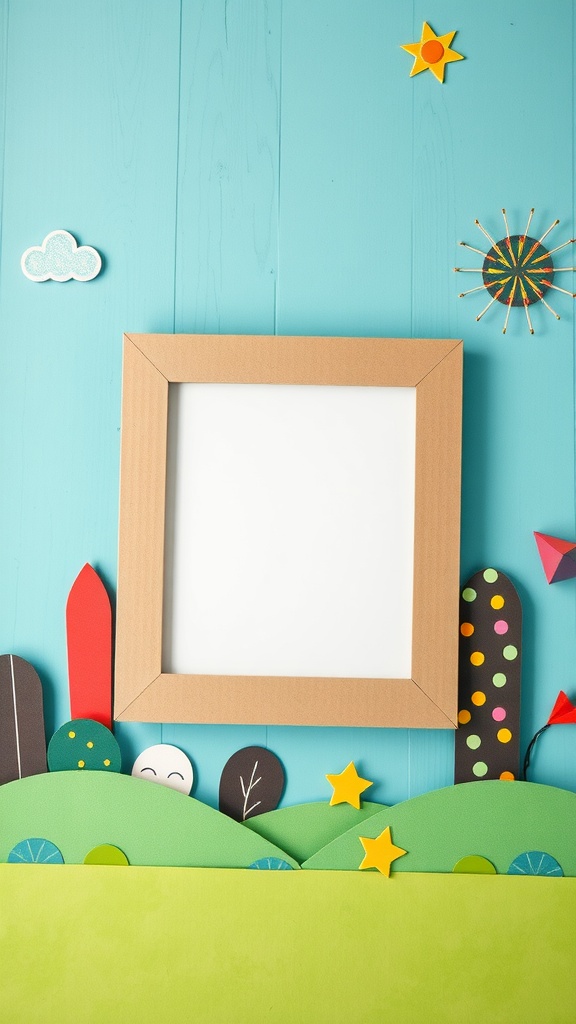
Creating photo frames from cardboard is a fun and easy way to express your creativity. The image shows a simple, yet charming cardboard frame surrounded by colorful paper decorations. These elements bring a cheerful vibe to the project.
To make your own frame, start by cutting a piece of cardboard into your desired shape and size. You can go for a classic rectangular frame like in the image or try something more unique. Next, decorate it with colorful papers, stickers, or even drawings. The bright colors and playful designs really enhance any photo you choose to display.
Once you have your frame decorated, simply place in your favorite picture. This DIY project is perfect for personalizing your space or giving as a gift. Plus, it only takes a few minutes!
Quick Fabric Scrap Bookmarks

If you have some leftover fabric scraps lying around, here’s a fun way to turn them into something useful. Quick fabric scrap bookmarks are not only easy to make but also add a personal touch to your reading experience.
The image shows a stack of books with colorful fabric bookmarks nestled between the pages. These bookmarks feature vibrant patterns like flowers and stars, making them a delight to look at. The different colors and designs can reflect your personality or the themes of the books you love.
To create your own bookmarks, simply cut your fabric into rectangles. You can even use different sizes for variety. Next, sew the edges to prevent fraying. If you want to take it a step further, add some elastic or ribbon for a secure hold. Within minutes, you’ll have unique bookmarks that make reading even more enjoyable!
DIY Colorful Wall Art with Tape

Creating colorful wall art using tape is a fun and quick way to add a splash of personality to your space. The image shows vibrant letters made from tape, spelling out cheerful messages. This design is playful and perfect for brightening up a room.
To start, gather some colorful tape in various shades. You can use painter’s tape, washi tape, or any other decorative tape you like. Choose a blank wall or a canvas as your canvas. Begin by planning out a simple phrase or design. The phrase in the image, for example, gives off a positive vibe with ‘HAPPY WORDS.’
Next, simply cut the tape into the desired lengths and stick them onto the wall or canvas. Play around with different colors and orientations to create depth and dimension. This craft is a great way to express creativity without a huge time commitment.
As you create, don’t hesitate to experiment with different fonts or shapes. The more playful you are, the more unique your wall art will be. In just a few minutes, you can transform a blank space into a colorful statement piece. So grab your tape, and let the creativity flow!
Quick Paper Flowers for Instant Decor

Want to add a splash of color to your space without spending a lot of time? Quick paper flowers are the answer! These vibrant blooms not only brighten up any room but are also super easy to make. Plus, they require minimal supplies and can be completed in just a few minutes.
Imagine a beautiful bouquet of paper flowers in shades of pink, yellow, and orange, just like the ones in the image. They look cheerful and inviting, making them perfect for any occasion. You can use colored paper, scissors, and glue to create these lovely decorations. The best part? You can customize the colors and shapes to match your décor!
To start, cut petal shapes from your colored paper. You can make them as large or small as you like. Next, layer the petals to form flowers, securing them with glue. Attach them to green paper stems for a natural look. Display your creations in a vase to bring instant charm to your home.
Whether you’re prepping for a party or just want to spruce up your living area, these quick paper flowers are a fun and creative way to express yourself. You don’t need to be an expert crafter to enjoy this project. Grab some paper and get started!
Upcycled Jar Candle Holders

Upcycling is not just about being eco-friendly; it’s a fun way to add a personal touch to your home. These jar candle holders are perfect for brightening up any space. Using simple glass jars, you can create lovely accents that look stylish while giving a nod to sustainability.
In the image, you’ll see a collection of glass jars, some adorned with twine and colorful rubber bands. The soft glow of the candles inside creates a warm atmosphere that’s inviting and cozy. You can use any jars you have around the house, so it’s a budget-friendly option for home decor.
To make your own jar candle holders, gather a few empty glass jars, some candles, and any decorative items like twine or ribbons. Start by cleaning the jars thoroughly. Then, place a candle inside each jar. If you want to get creative, you can add some embellishments like a bow or a colorful band around the top. Light the candles, and watch how they transform your space.
This project is not just quick; it’s also a delightful way to express your creativity. Whether you’re hosting a dinner party or just enjoying a quiet evening, these candle holders will add a lovely touch to your decor.
Simple Friendship Bracelets with Beads

Friendship bracelets are a fun and creative way to express your bond with friends. In just a few minutes, you can make colorful beaded bracelets that are not only stylish but also carry sentimental value. The image showcases an array of vibrant, beaded bracelets, each uniquely designed and ready to wear.
To start making your own friendship bracelets, you’ll need some basic supplies. Gather colorful beads, elastic string, and a pair of scissors. Choose beads that represent your friendship, maybe in colors that hold special meaning for you both.
Begin by cutting a length of elastic string to your desired size. A good rule of thumb is to measure it around your wrist and add a couple of extra inches. Next, thread the beads onto the string in a pattern that you like. You can mix and match colors and shapes to create something truly personal.
Once you have added enough beads, tie the ends of the string together securely. Make sure the knot is tight so that the bracelet holds together well. You can add a drop of glue to the knot for extra security if you’d like. And there you go! You’ve crafted a lovely friendship bracelet that you can gift to a friend or wear yourself.
These bracelets make for great gifts and can be customized for any occasion. Whether you’re spending time with friends or just looking for a creative outlet, making friendship bracelets is a delightful way to express yourself.
Charming Rock Painting Ideas

Rock painting is a cheerful and simple way to express your creativity. The image showcases a delightful collection of painted rocks, each adorned with playful designs and bright colors. You can see a variety of expressions, flowers, and words that bring a smile to your face.
To start your own rock painting adventure, gather some smooth, clean stones and get your hands on acrylic paints or permanent markers. The materials are easy to find, and the process is all about having fun.
Consider painting happy faces, heartwarming messages, or beautiful flowers, just like the rocks shown in the image. These little creations can brighten up your garden or serve as thoughtful gifts for friends and family.
Before you begin, plan your design. You could sketch it lightly with a pencil on the stone to guide your painting. Once the paint dries, seal your masterpiece with a clear varnish to protect it from the elements, especially if you plan to display it outdoors.
So grab some stones, unleash your creativity, and let your imagination run wild! Rock painting is a delightful way to relax and enjoy some quality time with loved ones.
Instant Gratitude Jars for Positivity

Creating an instant gratitude jar is a fun and simple craft that can brighten your day. The image shows a clear jar filled with colorful sticky notes, each carrying a message of thanks or appreciation. These notes capture the small, joyful moments that we often overlook.
To start, gather a jar and some sticky notes in various colors. You can use any kind of container, but a transparent one lets you see all the cheerful messages inside. Grab a pen and begin writing down things you’re thankful for—whether it’s a compliment from a friend or a cozy cup of coffee. Don’t worry about writing beautifully; just let your gratitude flow.
As you fill the jar with notes, you create a visual reminder of positivity. When you’re feeling down or need a boost, simply pull out a note and read it. You might find that even the smallest moments can bring a smile to your face.
This activity takes just a few minutes, but it can have a lasting impact on your mood. Plus, it’s a lovely way to engage with family or friends—invite them to write notes and add them to the jar. Soon, you’ll have a collection of cheerful thoughts that can inspire everyone.
Easy Hand-Painted Stones for Garden Decor

Hand-painted stones are a delightful way to add personality to your garden. The image shows two creatively painted stones nestled among vibrant flowers, bringing a splash of color and whimsy to the scene. One stone features the cheerful phrase ‘Happy fontudes,’ while the other displays a cute character, inviting smiles from anyone passing by.
Creating these stones is a fun and simple project that doesn’t require a lot of time or materials. All you need are smooth stones, some paint, and a bit of creativity. You can use acrylic paints for bright colors that stand out against the greenery and blooms in your garden.
Start by picking a few stones that catch your eye. Clean them off and let them dry. Then, grab your paintbrushes and start crafting your designs. Whether you want to write uplifting words or paint playful characters, the options are endless. This little touch can transform a plain garden spot into a lively and inviting space.
Once your stones are dry, find a cozy spot in your garden to display them among the flowers, just like in the image. These hand-painted stones not only enhance your outdoor space but also make for a lovely conversation starter. Plus, it’s a great project to do with kids or friends, bringing everyone together for a bit of fun and creativity.
Simple Clay Pot Planters with Faces

These clay pot planters add a sprinkle of cheer to any space. With their cute faces painted on, they turn ordinary pots into delightful decorations. Just imagine them brightening up your windowsill!
This project is quick and easy. You’ll need simple supplies: terracotta pots, acrylic paint, a paintbrush, and some potting soil. Start by painting the faces on the pots. Use bright colors for cheeks and a big smile to bring them to life.
Once the paint dries, fill each pot with soil and your favorite plants. Herbs or small flowers work well to keep the look fresh. Place your new planters in sunlight, and enjoy their charm as they grow!
Not only do these planters add personality to your home, but they also offer a fun way to express your creativity. Try different designs, and make a whole family of faces!
Quick Ribbon Bookmarks for Readers

If you love to read and want a simple way to keep your place in your favorite books, quick ribbon bookmarks are just the thing! These bookmarks are not only functional but also add a splash of color to your reading routine.
All you really need are some ribbons in various colors. You can choose your favorites or go with whatever you have lying around. Just cut them into equal lengths, usually around six to eight inches. This makes them the perfect size to stick out of a book without being too cumbersome.
Once you’ve cut your ribbons, simply tie a knot in one end. You can also create little loops or decorative bows if you’re feeling crafty. Then, tuck the other end into the pages of your book. Voila! You have a lovely bookmark that stands out and helps you find your spot easily.
These quick ribbon bookmarks can be made in just a few minutes. They’re a clever way to express your style while enjoying a good book. Plus, they make for a thoughtful gift for fellow book lovers too!
Miniature Terrariums with Succulents

Creating miniature terrariums with succulents is a fun and quick project that anyone can enjoy. These little glass gardens not only look cute but also bring a bit of nature indoors. The image shows a variety of terrariums, each filled with different types of succulents. The plants come in various shapes and colors, making each terrarium unique.
The process is simple. Start by gathering your supplies: small glass containers, potting soil, pebbles, and a selection of succulents. You’ll also need some decorative elements if you want to personalize your terrarium further. The ‘New Pet Surgen’ stone in the image adds a cute touch to one of the terrariums, showing how easy it is to make your terrarium special.
To assemble, layer some pebbles at the bottom of your glass container for drainage, then add potting soil. Carefully place the succulents in the soil, arranging them as you like. Finish off with more pebbles or decorative stones for a polished look. These miniature gardens are low-maintenance and can thrive in indirect sunlight, making them perfect for any space.
Whether you’re looking to spruce up your home or create a thoughtful gift, miniature terrariums are a delightful option. They bring instant creativity to your day and are a lovely reminder of nature, right on your desk or windowsill.
DIY Beaded Keychains for Personal Touch

Beaded keychains are not only functional but also a fun way to express your personality. The image showcases a colorful collection of keychains, each one unique with its vibrant beads and charms. From bright reds to soft pastels, these keychains add a cheerful touch to any set of keys.
Making your own beaded keychain is a simple project that requires minimal supplies. Gather some beads, a keyring, and a stretchy cord or string. You can choose beads that reflect your style or even colors that match your favorite outfits!
The process is easy. Start by cutting a piece of cord to the desired length. Then, string your beads in any order you like. Experiment with patterns or mix and match colors for a playful vibe. Once you’re happy with your design, tie the ends securely to the keyring. Voila! You have a personalized accessory that’s both useful and a great conversation starter.
This DIY project is perfect for a quick creative break. Whether you’re making them for yourself or as gifts, beaded keychains are sure to bring a smile. Plus, they’re a great way to use up leftover beads from other crafts!
Instant Magnets from Bottle Caps

If you have a collection of bottle caps lying around, why not turn them into instant magnets? This quick project is not only creative but also a fun way to personalize your fridge or any magnetic surface.
To start, gather your bottle caps, some strong adhesive, and small round magnets. You can find these magnets at craft stores or online. Simply apply a small amount of glue to the flat side of each bottle cap and stick a magnet on top. Allow them to dry completely, and you’re all set!
In the image, you can see a variety of bottle caps that have already been transformed into magnets. Each cap can add a splash of color and personality to your space. Whether they feature logos or whimsical designs, these magnets can hold up your important notes or simply act as decorative pieces.
This craft is perfect for those moments when you need a quick burst of creativity. It’s simple, cost-effective, and yields a unique result. Plus, it’s a great way to recycle bottle caps while adding a personal touch to your decor!
Quick Origami Animals for Fun

Origami is a fun and creative way to express yourself, and making quick origami animals can be a delightful distraction. In the image, you can see a colorful array of folded paper animals, each showcasing different shapes and designs. The vibrant colors add a cheerful touch, inviting anyone to dive into this crafty activity.
Creating these little creatures is easier than you might think! With just a single sheet of paper, you can fold your way to a variety of animals, from playful fish to adorable cats. Each piece takes only a few minutes, making it a perfect choice for a quick creativity boost.
To get started, all you need is some paper and a bit of patience. There are plenty of online tutorials available that can guide you through the folding process step by step. You don’t need to be an expert; even beginners can create something fun in no time!
So, if you’re feeling a bit bored or need a quick break, grab some colorful paper and let your imagination run wild. Who knows, you might end up with a whole zoo of origami animals by the end!
Personalized Coasters from Cork

Making personalized coasters from cork is a simple and fun way to add a personal touch to your home. The image shows a charming set of cork coasters, each uniquely designed. With just a few materials, you can create coasters that reflect your style or even make thoughtful gifts for friends.
To get started, you’ll need some cork coasters, paint or markers, and a sealant if you want to protect your work. Begin by sketching out your ideas. You can write quotes, draw patterns, or even paint symbols that mean something special to you or the recipient.
Once you have your designs ready, use the paint or markers to bring them to life. Let your creativity flow! After everything dries, applying a sealant will help keep your coasters looking fresh and new. These personalized coasters not only serve a practical purpose but also add a cozy vibe to your living space.
In just five minutes, you can create something unique that enhances your decor or provides a delightful conversation starter when guests come over. It’s a quick and engaging way to express yourself through craft!
Easy DIY Party Hats from Paper

Creating fun party hats from paper is a simple and enjoyable activity that you can complete in just a few minutes. The image shows a colorful array of paper hats, each adorned with vibrant polka dots and topped with fluffy pom-poms. These cheerful accessories are perfect for any celebration, adding a playful touch to your gathering.
To make your own party hats, you’ll need some colorful paper, scissors, a glue stick, and pom-poms. Start by cutting a large triangle from the paper. Once you have the triangle, roll it into a cone shape and secure the edge with glue. Attach a pom-pom to the tip for an extra splash of fun!
Not only do these hats look great, but they also serve as a fantastic way to get everyone involved in the festivities. Guests of all ages can customize their hats with stickers or markers. It’s a playful craft that sparks creativity and brings smiles.
Quick Pom-Pom Keychains for Fun

Pom-pom keychains are a delightful way to brighten up your keys or bag. They add a splash of color and a touch of whimsy to your everyday items. In this image, you can see an assortment of vibrant pom-poms, each hanging from a shiny chain. The bright yellow background makes these colorful crafts really pop, creating a cheerful atmosphere.
Making these keychains is super easy and quick, making them perfect for a short crafting session. All you need are some colorful yarns, scissors, and keychain rings. Start by wrapping the yarn around your hand or a piece of cardboard until you have a good amount. Then, tie it tightly in the middle and cut the loops at both ends. Fluff it up, attach it to a keychain ring, and voila! You have a cute little accessory that shows off your creativity.
These keychains also make lovely gifts or party favors. You can customize them with different colors to match the recipient’s style. Each pom-pom is unique, adding a personal touch to your creations. So grab some yarn and let your imagination run wild!
Instant Fridge Magnet Art with Photos

Creating fridge magnet art is an easy way to add a personal touch to your kitchen. Using simple materials, you can make your refrigerator a canvas for cherished memories. This project is quick and fun, making it perfect for a burst of creativity.
The image shows an array of colorful photos alongside magnetic letters. Each photo captures a moment, whether it’s a beautiful landmark or a candid shot of friends. This mix not only brightens up the fridge but also sparks conversations when guests come over.
To get started, gather some of your favorite photos. You can print them out or even use old postcards. Grab some magnetic sheets or magnets, scissors, and glue. Cut the photos to size and attach them to the magnets. It’s that simple!
Once your magnets are ready, arrange them on your fridge. You can spell out fun phrases with the letters, adding a playful element to your art. This DIY project allows you to showcase your personality and memories in a way that’s uniquely yours.
Easy DIY Greeting Cards with Stamps

Making greeting cards at home can be a fun way to express your creativity. The image showcases a collection of handmade cards adorned with colorful stamps and designs. Each card features unique patterns, from floral motifs to hearts, ensuring that there’s a card for every occasion.
To start your own card-making adventure, gather some blank cards, colorful inks, and your favorite stamps. You can choose from simple shapes or intricate designs to create your masterpiece. Don’t worry about perfection; each card should reflect your personality and style.
Begin by picking a card and a stamp. Apply ink to the stamp and press it firmly onto the card. Experiment with different colors and placements for a personalized touch. You can even add a few handwritten notes inside to make it feel special.
These DIY cards are perfect for birthdays, holidays, or just because. With just a few minutes and some basic supplies, you can create something meaningful that will surely brighten someone’s day.
Decorative Book Covers Using Wrapping Paper

If you’re looking for a quick way to add some flair to your books, decorative book covers using wrapping paper are a fun and easy craft. The image showcases a colorful display of wrapped books, each sporting unique patterns and designs. It’s a simple project that can breathe new life into old books or even new ones you want to personalize.
To get started, all you need is some wrapping paper, scissors, and tape. First, measure the height and width of your book. Cut a piece of wrapping paper slightly larger than these measurements. This extra paper will help you cover the edges completely.
Next, lay the book in the center of the wrapping paper. Fold the paper over the front cover, then the back cover, and secure it with tape. You can even use a decorative tape for an added touch. Don’t forget to fold in the corners neatly so that they look tidy. This small detail can significantly enhance the overall appearance.
Once finished, your books will not only look pretty on the shelf but also be protected from wear and tear. This project is perfect for those who love to get creative without needing a lot of time. Plus, it’s a great way to use up leftover wrapping paper!
Creative Beaded Hair Accessories

If you’re looking for a fun and quick way to express your style, crafting beaded hair accessories is an enjoyable project. The image showcases a lovely selection of beaded bracelets, each with unique colors and textures. These bracelets can easily be transformed into hair accessories, adding a personal touch to any hairstyle.
Making these accessories is simple. You’ll need some beads in various sizes and colors, elastic string, and scissors. Just cut a length of elastic to fit your wrist or desired hair accessory length. Then, string the beads onto the elastic in a pattern you like. When you’re satisfied, tie the ends securely and voila! You’ve got a beautiful beaded accessory.
Using these beaded pieces in your hair is easy. Simply tie your hair back and wrap the beaded string around your ponytail or bun. You can also use smaller pieces as hair clips or pins. This way, you can switch up your look in just a few minutes while showcasing your creativity.
Simple String Art Designs for Fun

String art is a delightful way to express your creativity without spending hours on a project. The image shows a beautiful string art piece featuring a serene landscape. The combination of wood, string, and simple shapes creates a charming design that can brighten up any room.
In this artwork, you can see a winding path leading through a stylized landscape of hills and trees. The use of blue and white strings enhances the visual appeal, making it look both calming and inviting. The word ‘Caloen Love’ adds a personal touch, making it a perfect gift or a piece for your own space.
To create your own string art, all you need is a wooden board, some nails, and colorful strings. Start by sketching a simple design on the board. Then, hammer in the nails along the outline of your design. Once the nails are in place, wrap the string around them, crisscrossing to fill in the shapes. It’s a straightforward and rewarding process that results in a unique piece of art.
Instant Decorative Pillow Covers

Freshening up your living space can be as simple as swapping out pillow covers. These covers can transform your couch into a vibrant gathering spot, bringing in colors and patterns that reflect your style.
For a quick DIY project, grab some fabric in your favorite prints. Floral patterns, like the ones seen in the image, are lively and invite a cheerful vibe into the room. You can choose bold colors or go for softer tones, depending on your mood.
To make the covers, all you need is fabric, scissors, and a sewing machine—or you can even use fabric glue for a no-sew option! Cut the fabric to the size of your pillow, leaving a little extra for seams. Then, simply sew or glue the edges together, leaving an opening for the pillow insert. It’s a fast and fun way to add a personal touch to your decor.
Once you’ve made your covers, just slip them over your pillows and arrange them on your couch. This quick change can instantly uplift the atmosphere in your home.
Instant Cupcake Toppers Using Paper

Cupcakes are delightful treats, and they become even more fun with easy-to-make toppers. Using colorful paper, you can create fun designs that bring a personal touch to your baked goods. The image showcases cupcakes adorned with vibrant lettered toppers, making them perfect for any occasion.
To make these instant cupcake toppers, you only need a few supplies: colored paper, toothpicks, scissors, and glue. Start by cutting out shapes or letters from the paper. You can spell out names, write fun phrases, or just stick to simple shapes. Attach these cutouts to toothpicks using glue, letting them dry completely.
Once your toppers are ready, simply insert them into the frosted cupcakes. Each cupcake transforms into a little celebration just waiting to be enjoyed. This is a quick and fun way to add some creativity to your dessert table.
Quick Fabric Flower Hair Clips

If you’re looking to add a fun pop to your hairstyle, these fabric flower hair clips are a delightful choice. They’re quick to make and can brighten up any look in just a few minutes. Plus, they’re customizable to match your favorite outfits!
In the image, you can see an array of colorful flower clips, showcasing lovely hues like orange, blue, pink, and purple. Each flower has a shiny embellishment in the center, adding a touch of sparkle. These clips are not just pretty; they are simple enough to create even if you’re short on time.
To make your own fabric flower hair clips, you’ll need some colorful fabric, a pair of scissors, a hot glue gun, and hair clips. Start by cutting the fabric into petal shapes. Layer them together to form a flower and secure them with hot glue. Finally, attach the flower to the hair clip. It’s that easy!
These hair clips can be worn for casual outings, parties, or even as a fun accessory for kids. You can mix and match colors to suit your mood or the season. So, gather your supplies and get ready to unleash your creativity!
Simple Painted Rocks for Classroom Decor

Painting rocks is a fun and simple craft that adds a personal touch to any classroom. The image shows an assortment of colorful rocks, each uniquely designed with different patterns and letters. These little pieces of art can brighten up a dull space and spark creativity in students.
To get started, you’ll need a few smooth rocks, some acrylic paint, and brushes. Gather your materials and find a spot where you can let your creativity flow. You can paint names, fun designs, or even motivational words that can encourage students throughout the day.
Once the rocks are painted, let them dry completely. After that, they can be placed on desks, shelves, or even as part of a larger decoration. Not only does this craft keep hands busy, but it also creates a warm and welcoming environment. Plus, students will love seeing their work displayed proudly!
Creative Nature Collages with Leaves

Nature collages are a fun and simple way to unleash your creativity. They let you explore various textures and colors while connecting with the outdoors. The image presents a vibrant arrangement of leaves, flowers, and colorful letters, creating a beautiful display of natural artistry.
Gathering materials is easy. Head outside to collect different types of leaves and flowers. Look for unique shapes and hues that catch your eye. Once you have your collection, find a flat surface to work on. A canvas or sturdy paper works well.
Next, experiment with arranging your finds. Lay down the letters and surround them with leaves and blooms. You might want to spell out a word or phrase that inspires you. This step is all about having fun and letting your imagination flow.
After you’ve settled on a layout, glue everything down securely. This helps ensure your collage stays intact. Once it’s dry, you can display your crafty creation anywhere in your home. It’s a lovely way to bring a piece of nature indoors.
Instant Wall Hangings from Yarn

Yarn wall hangings are a fun and quick way to add some character to any room. The pieces in the image show two distinct styles that can easily be recreated at home. The vibrant colors and creative designs instantly catch the eye, making them perfect for a pop of creativity in your space.
To make your own wall hanging, all you need is some yarn, a wooden dowel, and a pair of scissors. Start by cutting yarn into varying lengths, depending on how long you want your pieces to hang. You can mix and match colors like the hangings shown, or stick to a single color palette for a more cohesive look.
Next, you can use simple knotting techniques to attach the yarn to the dowel. For example, try using a lark’s head knot for easy attachment. Once you have your yarn in place, let your imagination run wild! Create patterns, shapes, or even add beads for extra flair.
Hang your finished piece on the wall, and enjoy the instant boost of creativity it brings to your space. These yarn wall hangings not only personalize your area but also offer a relaxing craft experience that you can complete in just a few minutes.
Colorful Paper Bookmark Designs

Nothing adds a personal touch to your reading experience like a colorful paper bookmark. These designs are not just practical; they can also be a fun creative outlet. Look at the variety displayed here, featuring bold colors and playful patterns.
Each bookmark tells a story with its unique design, whether it’s a floral print or a quirky quote. You can easily make these bookmarks at home using simple materials like colored paper, scissors, and markers. Just cut the paper into your desired shape, decorate it, and you have a lovely bookmark ready to use!
These bookmarks are perfect for gifts, especially for book lovers. Imagine receiving a handmade bookmark that reflects your personality! Plus, making them can be a relaxing activity. It’s a delightful way to boost your creativity in just a few minutes.
DIY Mosaics with Broken Tiles

Creating DIY mosaics with broken tiles is a fun and simple way to express your creativity. Look at the vibrant piece in the image! It features a beautiful mix of colors and shapes, making it a great example of how playful and artistic this craft can be.
To get started, gather some broken tiles, a sturdy base like a wooden board or canvas, and some adhesive. You can also use grouting material to fill in the spaces between the tiles for a polished look. Don’t worry about making everything perfect; the charm of mosaics lies in their unique, handcrafted feel.
Begin by arranging your tiles on the base without glue to find a design you like. This is your chance to have fun mixing different colors and textures! Once you’re satisfied with the layout, start gluing the tiles down. After the adhesive dries, you can apply grout if desired. This last step adds a finished touch and enhances the colors.
In just a few minutes, you’ll have a lovely piece of art to display. Not only is this an easy craft, but it also makes a great conversation starter!
Quick DIY Jewelry from Wire

If you’re looking to spark your creativity in a flash, making quick DIY jewelry from wire can be just the trick. Check out this lovely display of earrings, crafted from simple materials yet bursting with style. Each pair showcases unique designs, from elegant loops to playful swirls, demonstrating how versatile wire can be.
These earrings feature a mix of colors and shapes, making them suitable for any outfit or occasion. You don’t need to be a professional to create your own pair. With a few basic tools and some colorful wire, you can easily make jewelry that reflects your personality.
To get started, all you need is some wire, wire cutters, and pliers. Cut the wire into various lengths based on your desired design, then shape it into loops, curls, or other creative forms. Add beads or charms for an extra touch. In just a few minutes, you’ll have beautiful earrings that you can wear or gift to a friend.
So grab your materials and let your creativity flow! It’s a fun way to express yourself without spending too much time or effort.
Quick Fabric Scrap Coasters

Need a quick burst of creativity? These fabric scrap coasters are a fun way to personalize your space in just five minutes! They not only protect your surfaces but also add a splash of color to your decor.
To make these coasters, gather some fabric scraps in various colors and patterns. You can use old T-shirts, cotton fabric, or any material that catches your eye. Cut them into circles, or any shape you like, and layer them for a more textured look. Once you have your pieces, simply stitch or glue them together.
Once completed, they can be a lovely addition to your coffee table, just like the coasters in the image. Picture a cup of your favorite tea sitting on them, with their vibrant designs brightening up the room. Not only does this add a cozy touch, but it’s also a lovely way to showcase your crafting skills!
Miniature Succulent Planters

Miniature succulent planters are a delightful way to add a touch of greenery to your space without needing a lot of time or effort. These little plants are low-maintenance and come in various shapes and colors, making them perfect for any decor style.
The image shows an array of succulent planters basking in the soft sunlight by a window. The planters themselves have unique designs, some wrapped in textured fabric while others feature geometric patterns. This variety not only showcases the succulents beautifully but also adds an artistic touch to any room.
To create your own miniature succulent planters, all you need are small pots, succulent cuttings, and some potting soil. Simply fill the pots with soil, plant the cuttings, and place them in a spot where they can soak up some sunlight. It’s a fun and quick project that can brighten up your home!
Whether you’re decorating a desk or a windowsill, these miniature planters are a simple way to bring life into your space. Plus, they make great gifts for friends who might appreciate a little greenery in their lives!
Personalized Photo Frame Decorations

Creating personalized photo frame decorations is a fun and easy way to express your creativity. The image shows a beautifully decorated frame with a cherished photo, surrounded by various crafting materials. You have scissors, markers, and decorative items that can give your frame a unique touch.
Start by selecting a frame that you love. The one in the image features a bright, artistic design that stands out. You can paint your frame or add stickers, making it truly yours. Consider the theme of the photo you’re displaying. For a fun summer snapshot, use bright colors and playful decorations.
Don’t forget to personalize it with words or dates. The frame in the image has ‘Happy Maie 2013’ written on it. Adding a simple message makes the frame more special. You can use a label maker or write it by hand for a more personal touch.
Gather your supplies and let your imagination flow. With just a few minutes, you can transform a plain frame into a beautiful piece of art. This quick craft is perfect for those moments when you want to create something meaningful without a lot of time.